


It's 21 degrees and all hallows eve...It feels more like spring than autumn.
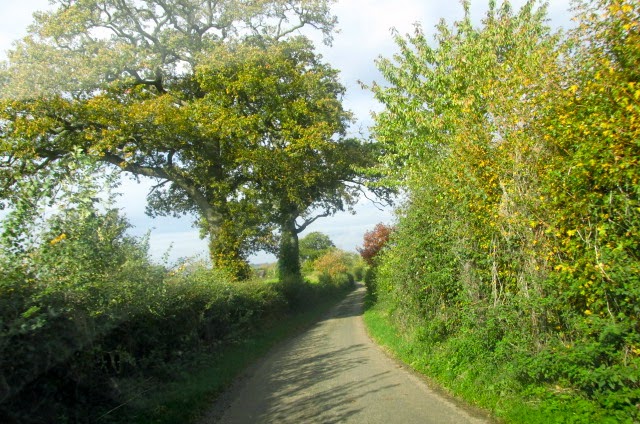
Our days are busy. We make trips to source materials for the house; wood or coir flooring, windows and doors. The sat nav sends us down lanes painted with vivid foliage and lilac skies, photoshopped by light and nature. It's hard to stay indoors.The garden that I share with the digger beckons me. I want to put my hands into the soil and feel it trickle through my dirty fingers. It's different from the heavy clay that I'm used to.
I begin a mini excavation, discovering hidden treasures; small paths and rock gardens, tiny buds peeping through the feathery carpet. I smell pine from the tree and perfume from the blossoms that mask the earthy farmyard smells carried by the wind. I try to decipher the source. I should wear gloves but the earth feels so good. I remember the school sand box. Soiled fingers, magic potions and mud pies I could loose days here and almost do until it turns dark and the drizzle rain that at first was refreshing begins to send a chill down my back...and it's the witching hour...
Here's a mini pumpkin carving tutorial...thanks to my clever H who made this amazing lantern...


To make a pumpkin lantern you will need the following:
- a pumpkin
- either a pumpkin carving kit. You can find ones here of varying prices, or make up your own using knitting needles/bodkin/toothpick and kitchen tools including narrow bladed cerated edged knife and some kind of scoop or large spoon.
- a tea light and matches
- an image or template you can find some here, here and here, and there are lots more free downloads available on line.
- a chopping board or cutting mat
- dress making pins or tape
Method:
- Find/draw or photograph an image that you would like to carve onto your lantern. Choosing something that has a clear outline and strong details. Preferably in black and white. H used an image of ghoulish actor
Christopher Lee.(whoops, that should be equally ghoulish Vincent Price, thanks H) Make sure that it will fit onto the pumpkin and leave enough space for the lid and to hide the tealight. - Trace it onto a piece of baking parchment or tracing paper.
- Put the pumpkin onto your board and use a sharp cerated knife very carefully cut the top of close to the stalk. Keep this to place back onto the lantern when finished.
- Begin to carefully scoop out the flesh and seeds from inside the pumpkin leaving enough flesh to hold the pumpkin together when carved.
- Attach the paper to the pumpkin with some dress making pins or tape.
- Carefully prick the lines of the image onto the pumpkin using a tool, toothpick or a fine knitting needle or bodkin. The closer together the holes the better as this make a cerated edge that will be easy to cut or push out. Ensure that you keep enough of the flesh in tact so that you can see the lines of the image.
- Then begin to carve out the the image taking your time.
- Light a tea light to place inside and hey presto you have a ghoulish lantern...or maybe a cute little friendly casper ghostly one...

happy halloweeeen...eeen...Ya...ha...ha...ha...haaaaa...
debx
Sounds like you are making progress bit by bit :) What a fun way to do a pumpkin! I've never seen one like that :)
ReplyDeleteSlow but sure wins the day. I know Hannah is so clever...I will definitely have a go next year.
Deletedx
Wow...wow...wow!!!! Your clever H did an amazing job on that pumpkin lantern! Wow...I just can't stop looking at it.
ReplyDeleteYour photos are so captivating.I want to stroll down the lanes, frolic through those green pastures, and smell the earthy farmlands that you have described. Simply lovely, Deb!
I agree it was amazing. She says that she was very careful to make the initial pin pricks very close together so that she almost had a perforated edge to work from.
DeleteEverything all looked so lush and green that day that we had exactly the same feeling. I felt as though I should have been wearing a white cotton dress that day...shades of Tess of the d'urbevilles.
thanks Emily.
debx